
Projects
Organize storyboards into folders
The project view is where you organise and manage your storyboards and scripts. Projects act as folders that keep related storyboards and scripts together, and you can nest projects within each other to create a structure that matches how your team works.
The sidebar
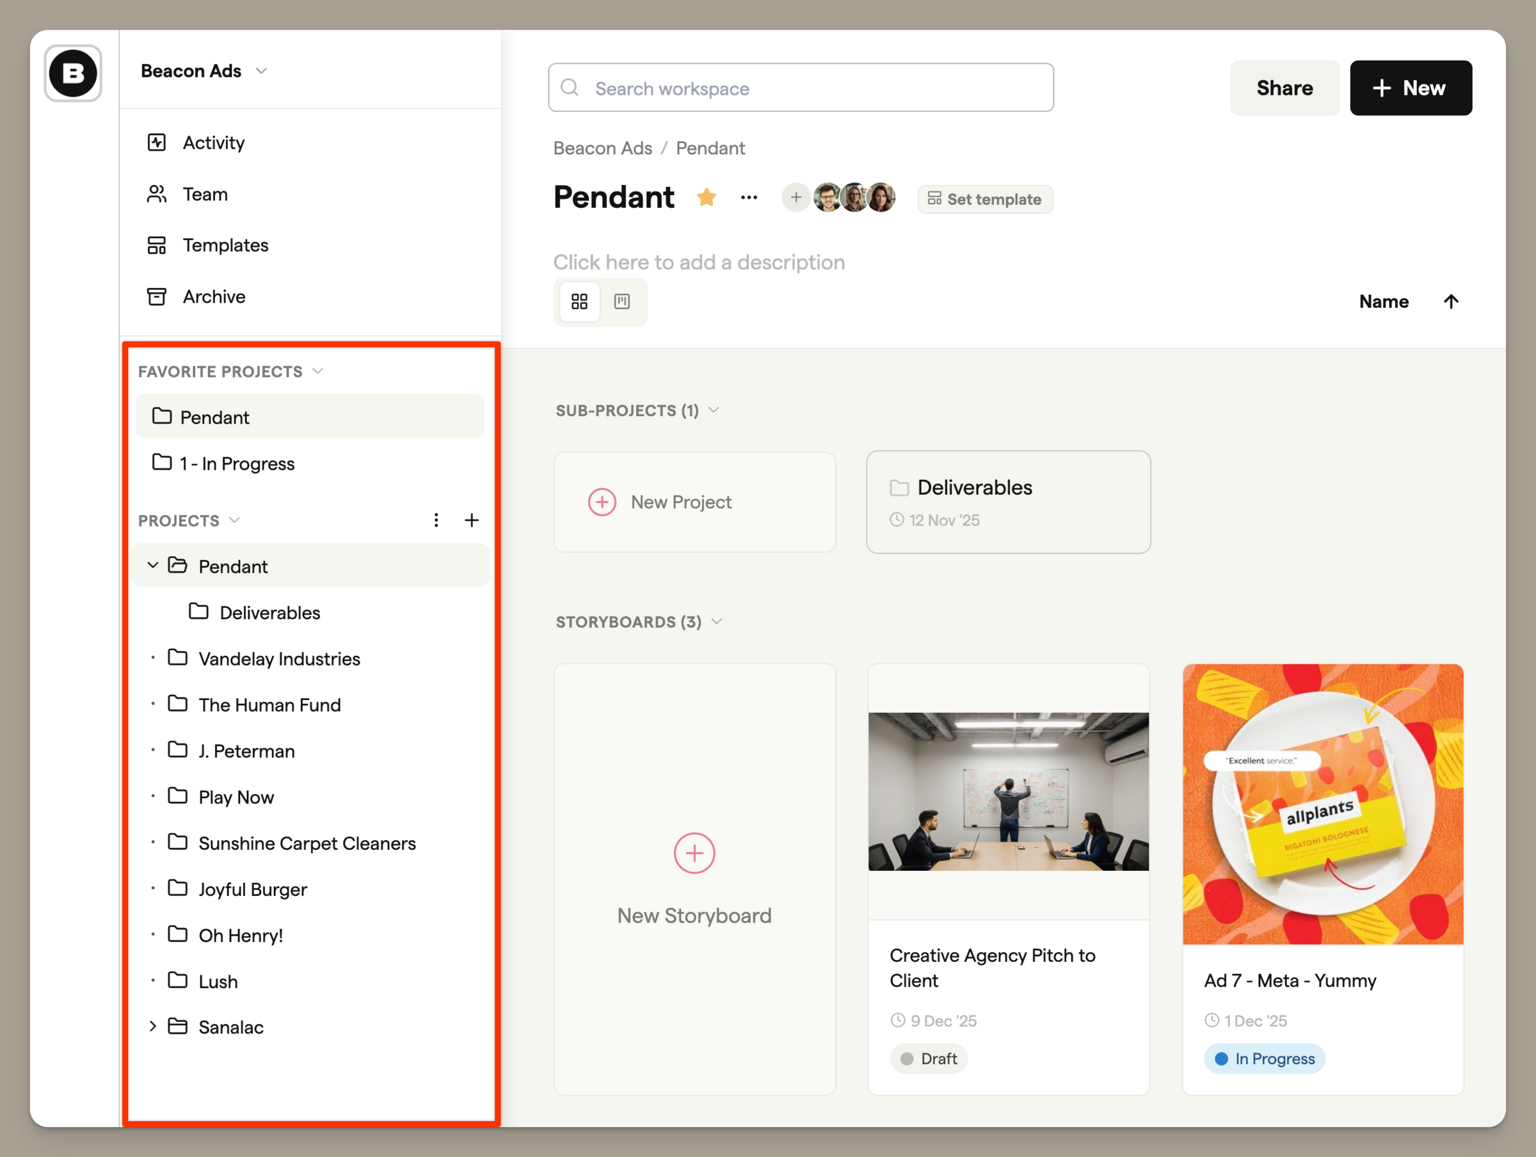
The sidebar on the left shows all your projects in a collapsible tree view. Click any project to see its contents in the main area.
Expanding and collapsing projects
Projects with sub-projects show a folder icon with a chevron. Click the chevron or folder icon to expand or collapse the project and reveal its sub-projects. Your expansion state is remembered, so projects stay open or closed as you left them.
Sorting projects
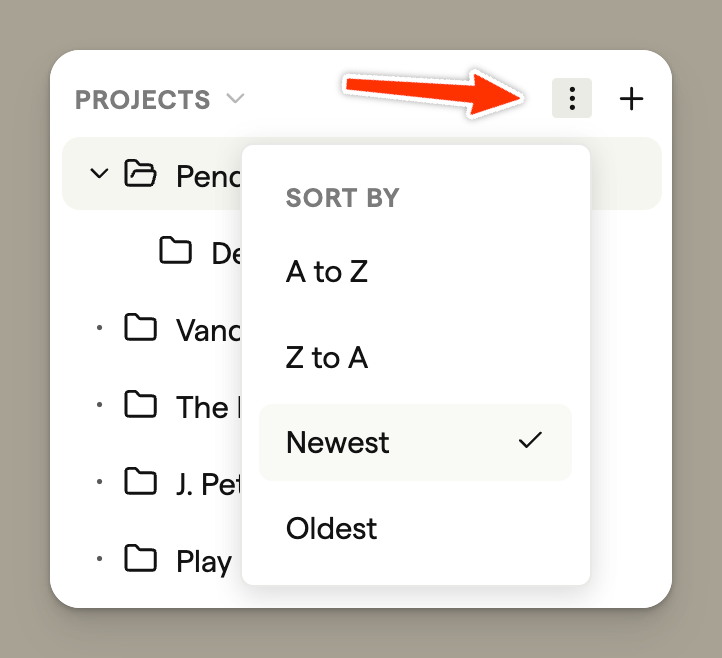
Click the three-dot menu at the top of the Projects section to change how projects are sorted:
- A to Z — Alphabetical order
- Z to A — Reverse alphabetical order
- Newest — Most recently created first
- Oldest — Oldest projects first
Favourite projects
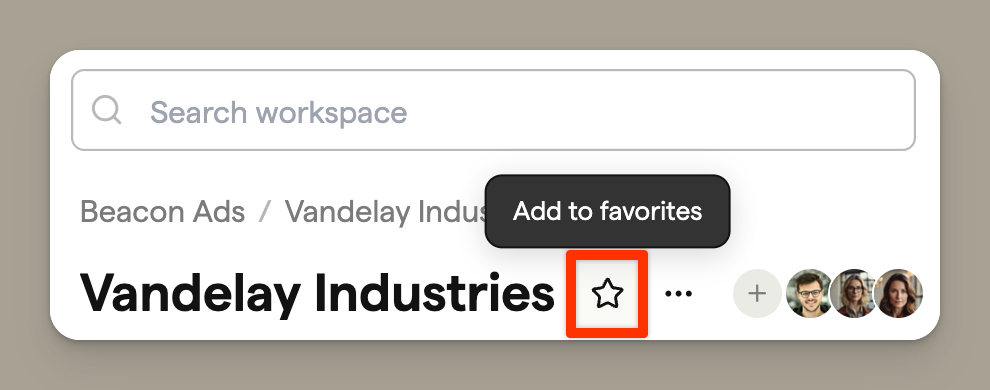
Mark projects you access frequently as favourites by clicking the star icon in the project header. Favourite projects appear in their own section at the top of the sidebar for quick access.
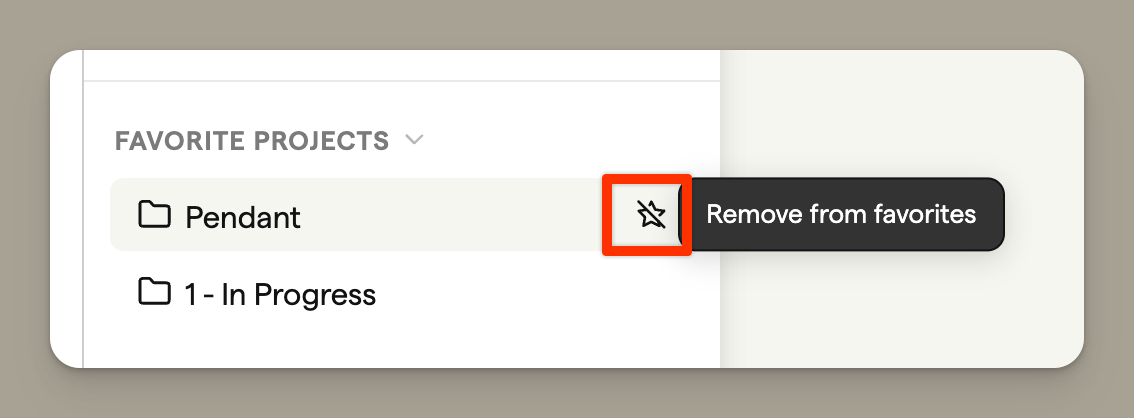
To remove a project from favourites, hover over it in the Favourite Projects section and click the star icon.
Creating projects
Click the + button in the sidebar header to create a new project. You can also hover over any existing project and click + to create a sub-project inside it.
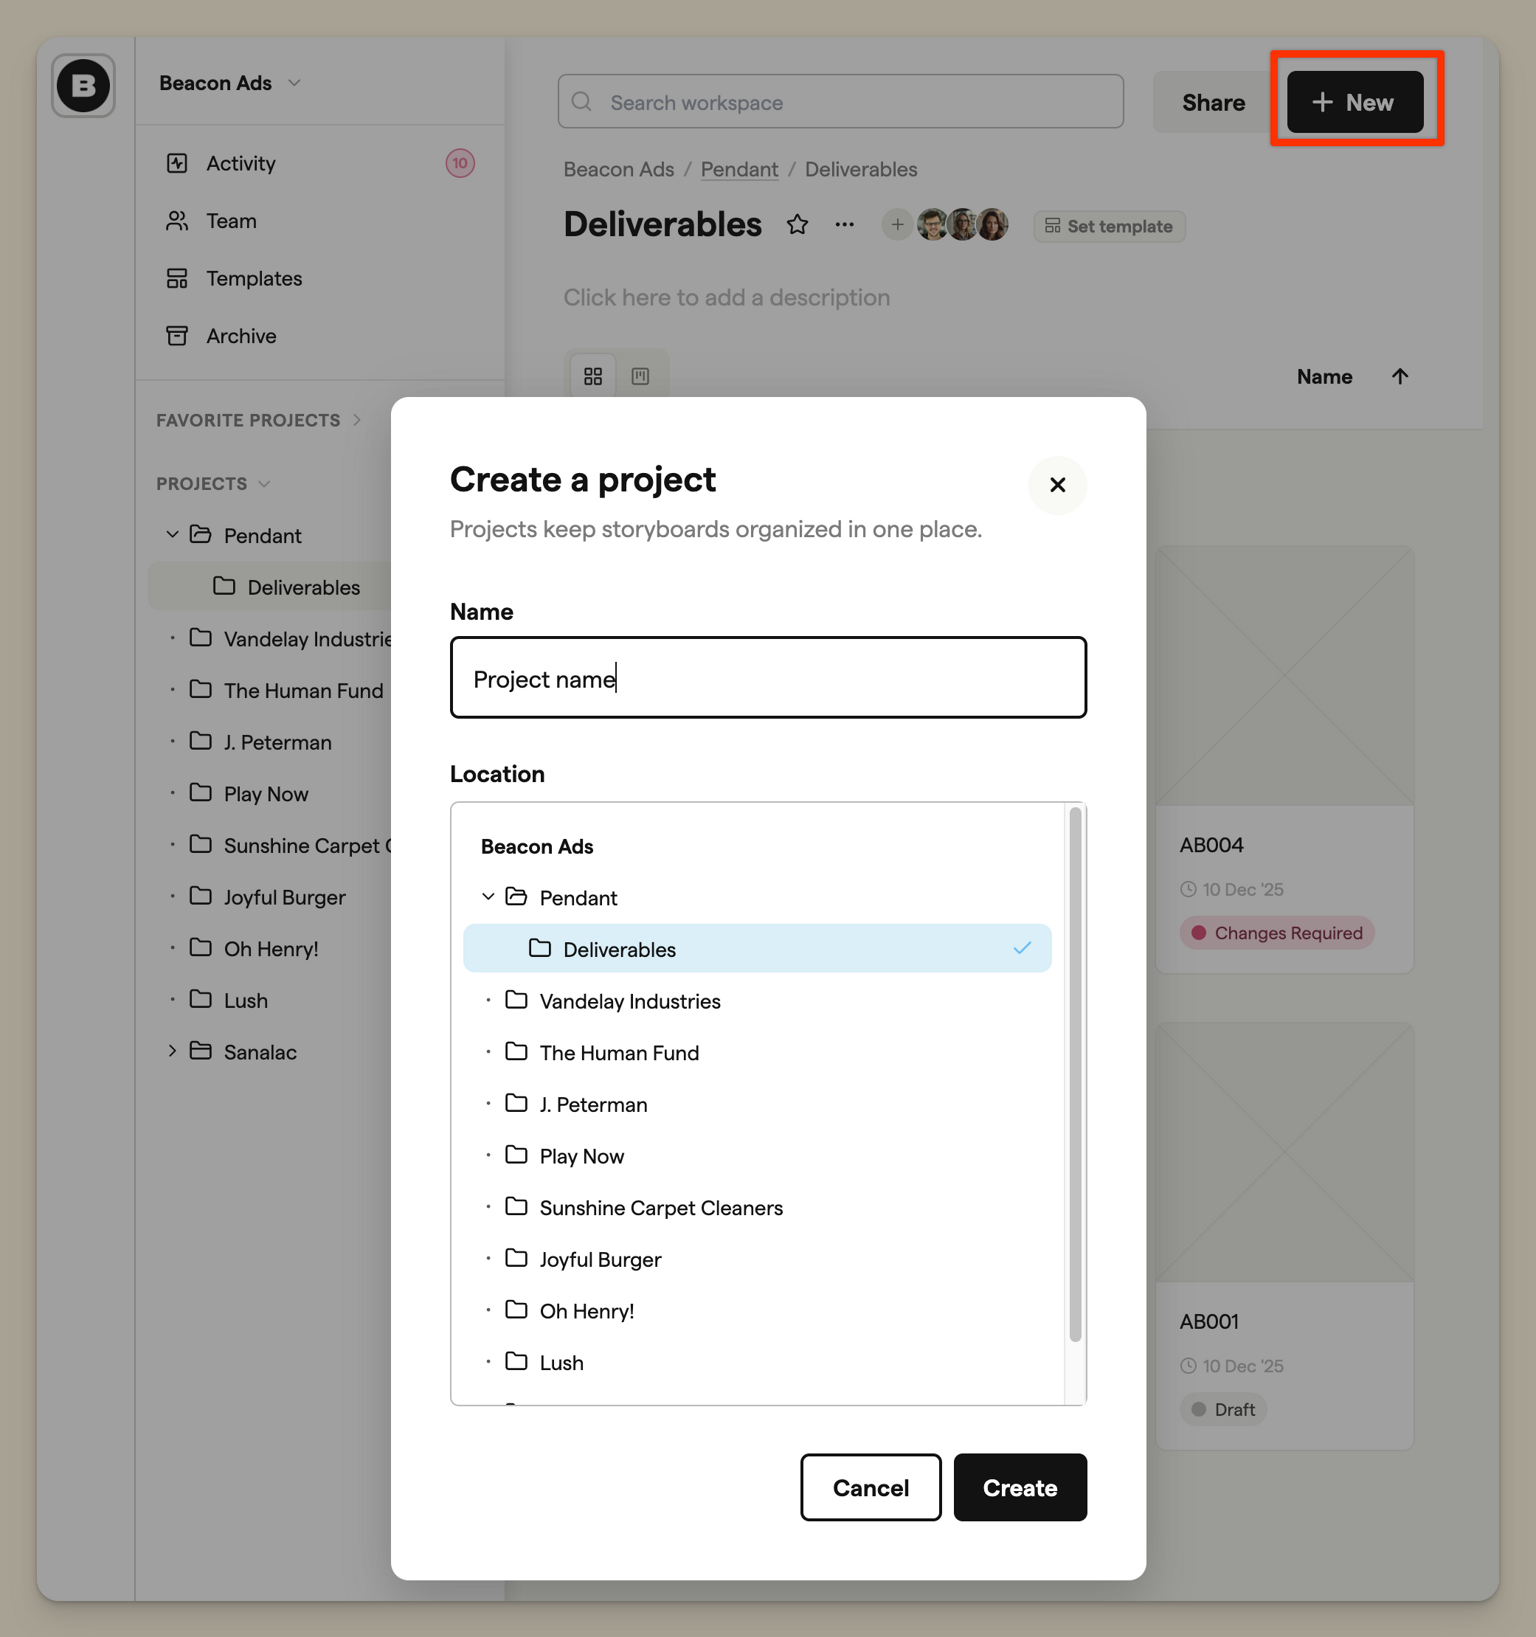
When creating a project, you'll need to:
- Enter a name for the project
- Choose a location (which project it sits inside, or at the top level)
Project contents
When you select a project, the main area shows its contents:
- Sub-projects: any projects nested inside the current one
- Storyboards: all storyboards in this project
- Scripts: all scripts in this project
Each section can be collapsed using the disclosure arrows if you want to focus on just one.
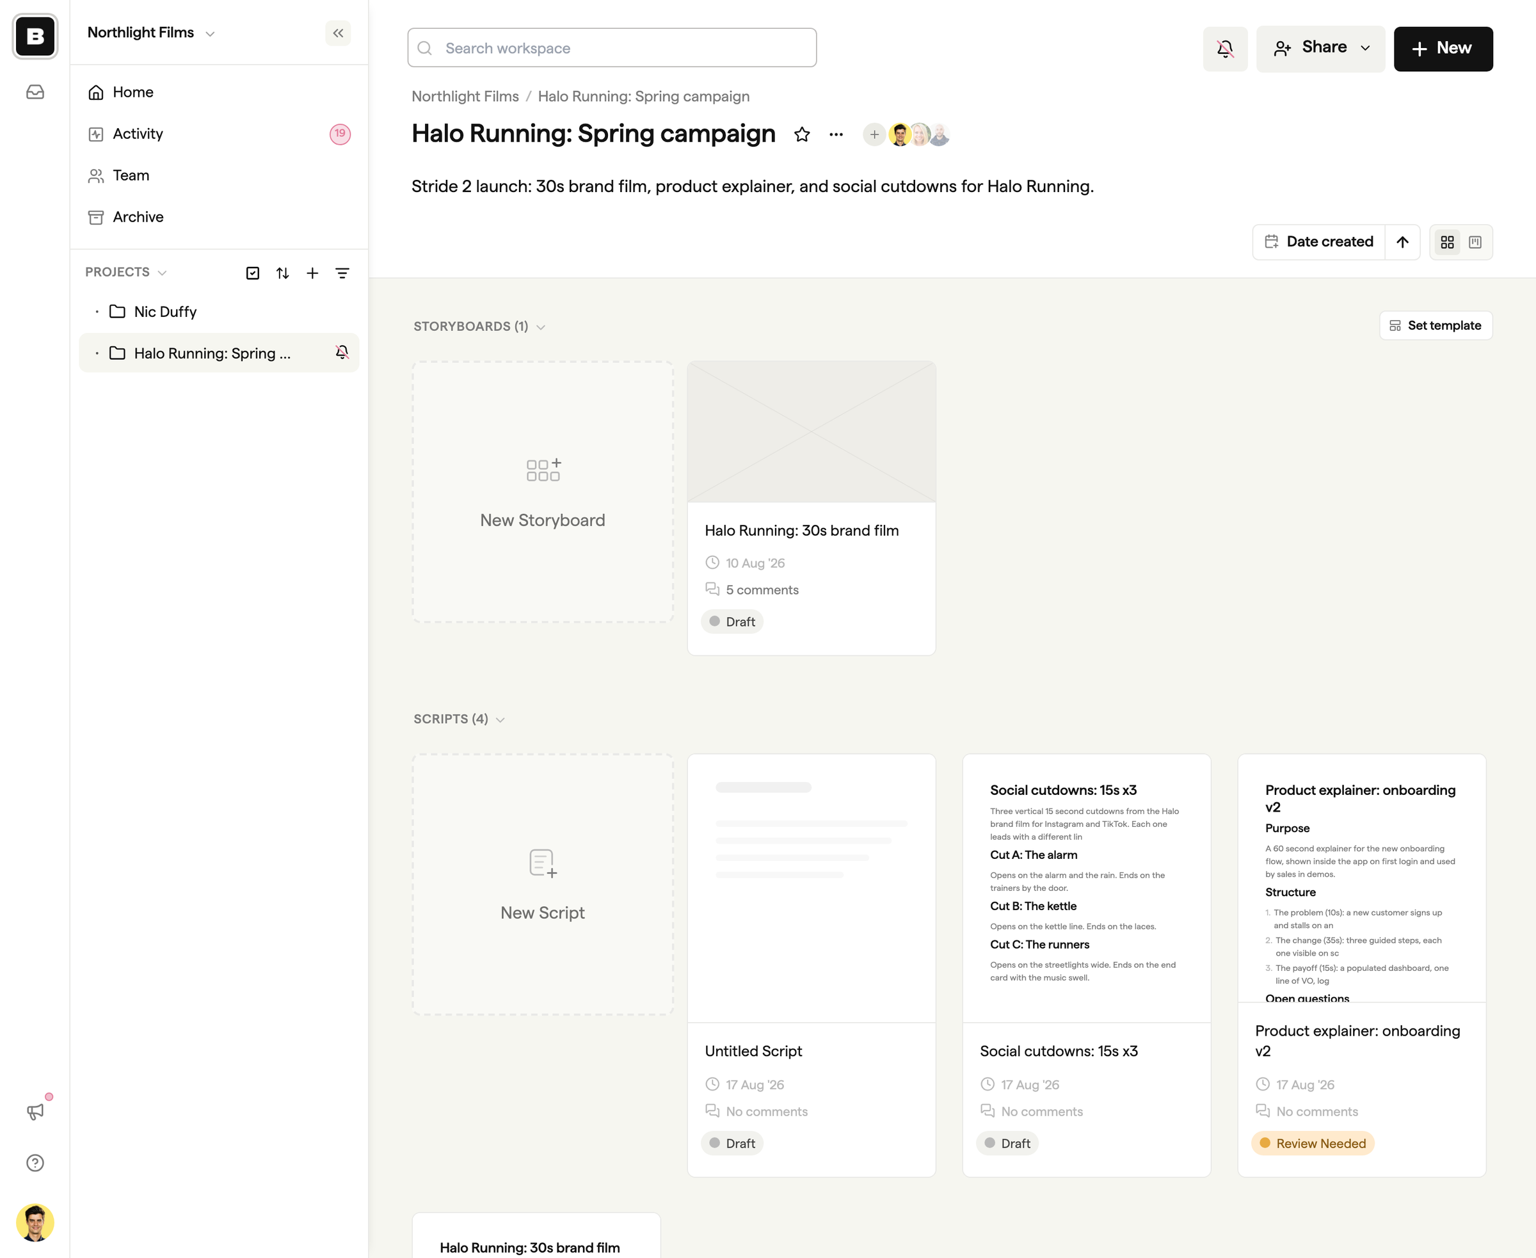
The Scripts section
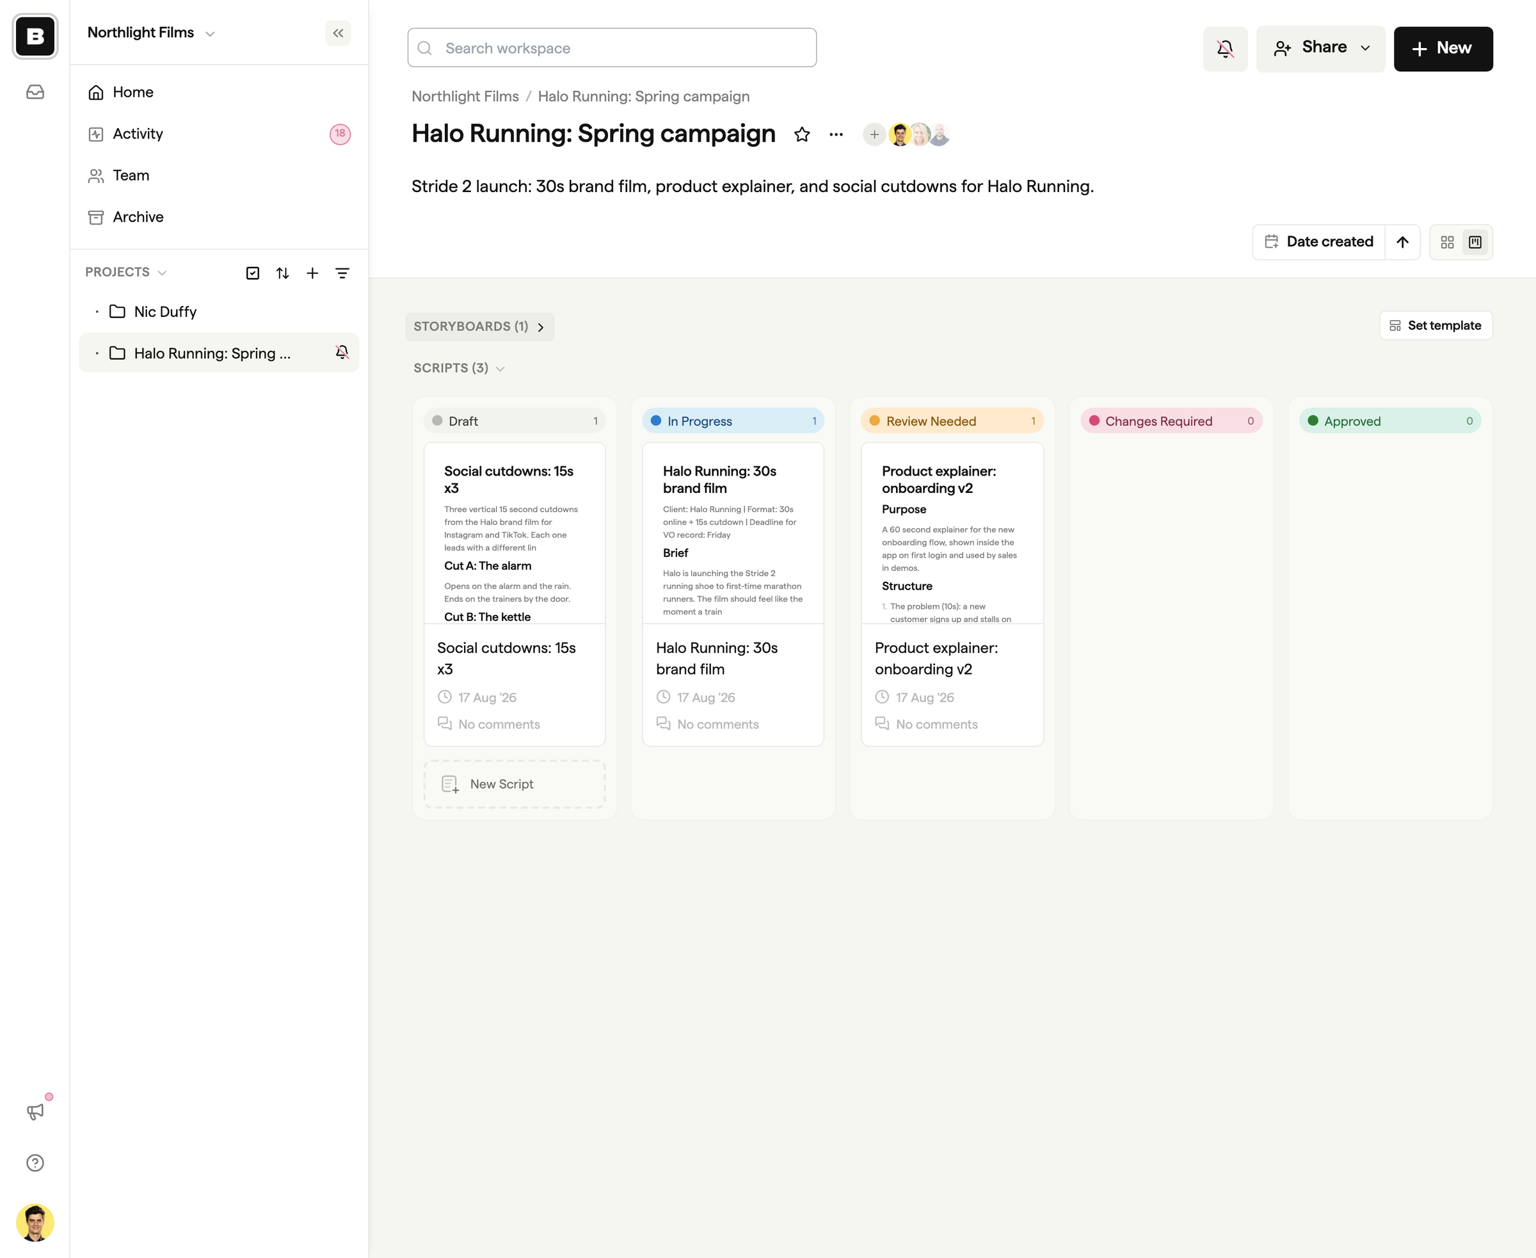
The Scripts section sits below Storyboards and works the same way. Click the New Script tile (or New → Create script in the header) to start a script, and each script appears as a card showing its name, a status dropdown, its comment count, and a preview of the document. Scripts are covered in full in the Scripts overview.
Sorting contents
Use the sort controls in the header to organise how sub-projects, storyboards, and scripts are displayed:
- Name — Alphabetical order
- Date created — When items were first created
- Date modified — When items were last updated
Click the arrow button to toggle between ascending and descending order.
Grid and Kanban views
You can switch between two ways of viewing your storyboards and scripts using the toggle in the header. The choice applies to both sections at once.
Grid view
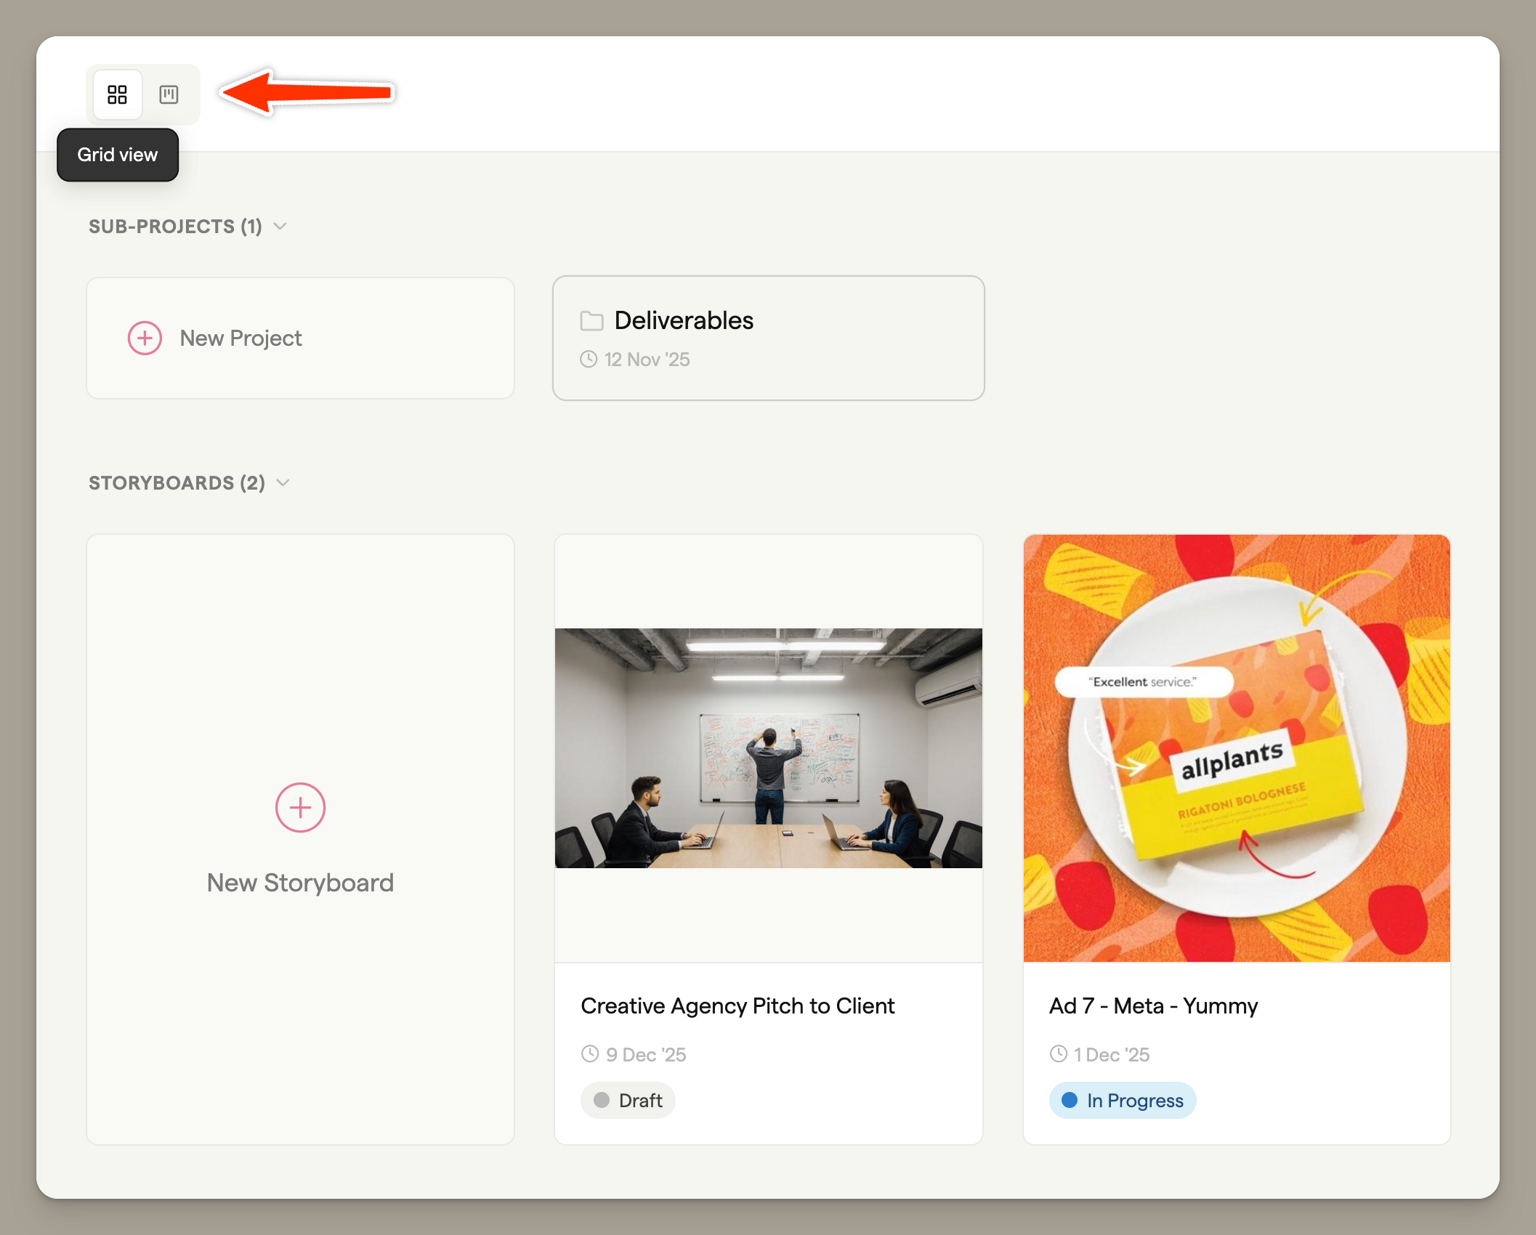
The default view displays storyboards as cards in a grid. Each card shows:
- A thumbnail preview of the storyboard
- The storyboard name
- When it was last updated
Hover over a storyboard card to see the scrubber (if the storyboard has multiple frames) and access the actions menu.
Kanban view
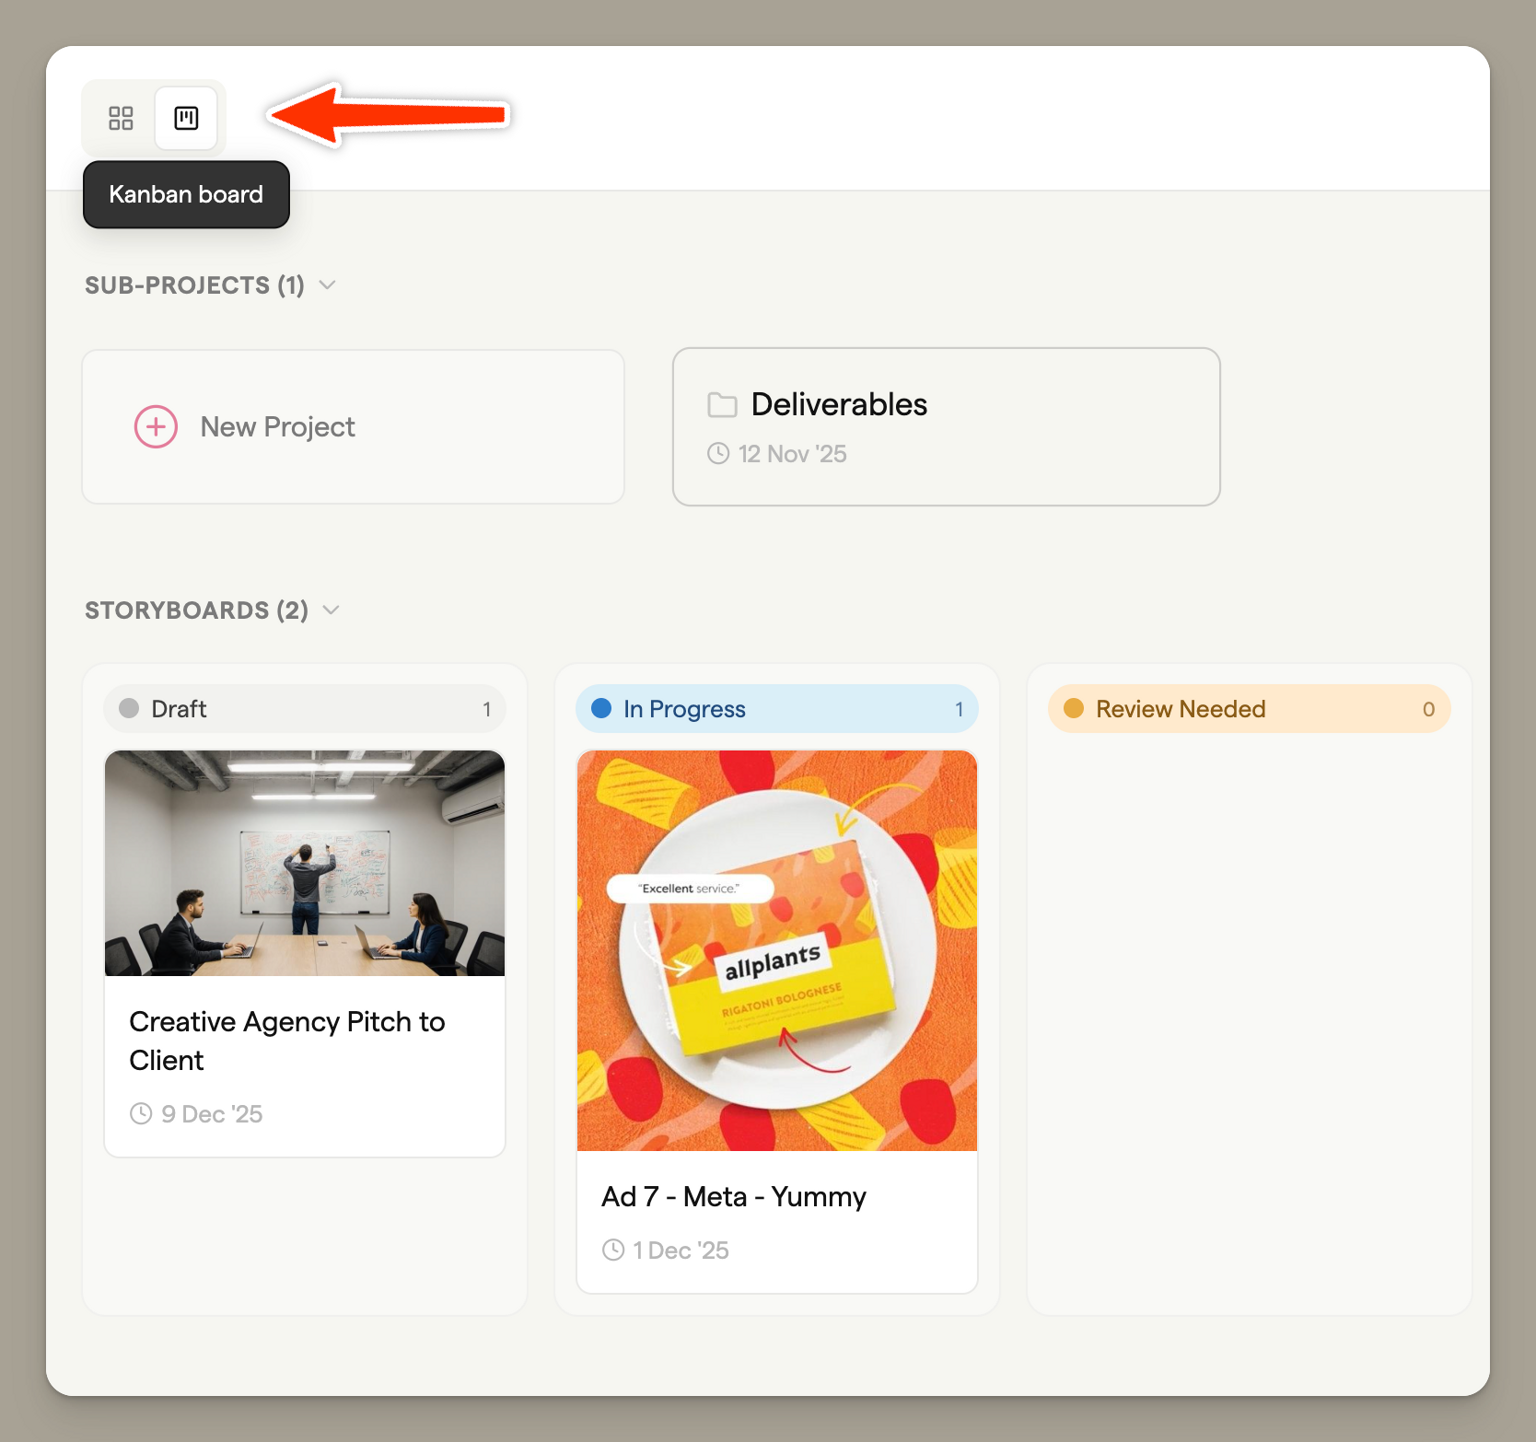
The Kanban view organises storyboards and scripts into columns based on their status, with each section keeping its own set of columns. This is useful for tracking progress across your team's workflow.
The five columns are:
- Draft — Storyboards with no status set
- In Progress — Work currently being done
- Review Needed — Ready for feedback
- Changes Required — Needs revisions
- Approved — Signed off and complete
Drag storyboards or scripts between columns to update their status. The status change is saved automatically. For scripts, status is set per version, so the card reflects the newest version.
Sharing a project
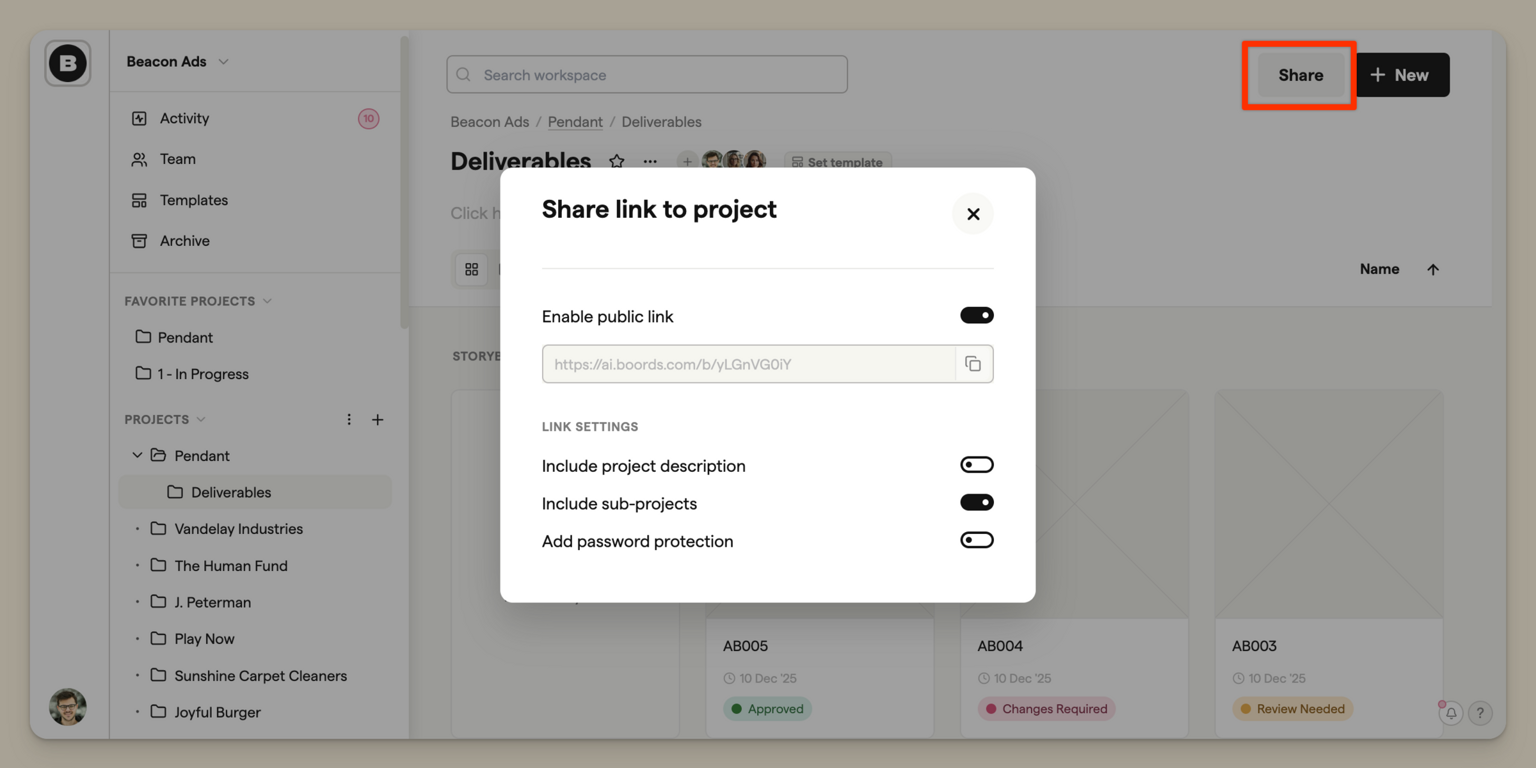
Share an entire project with people outside your team using a public link. Click the Share button in the project header to open the sharing dialog.
Enabling public access
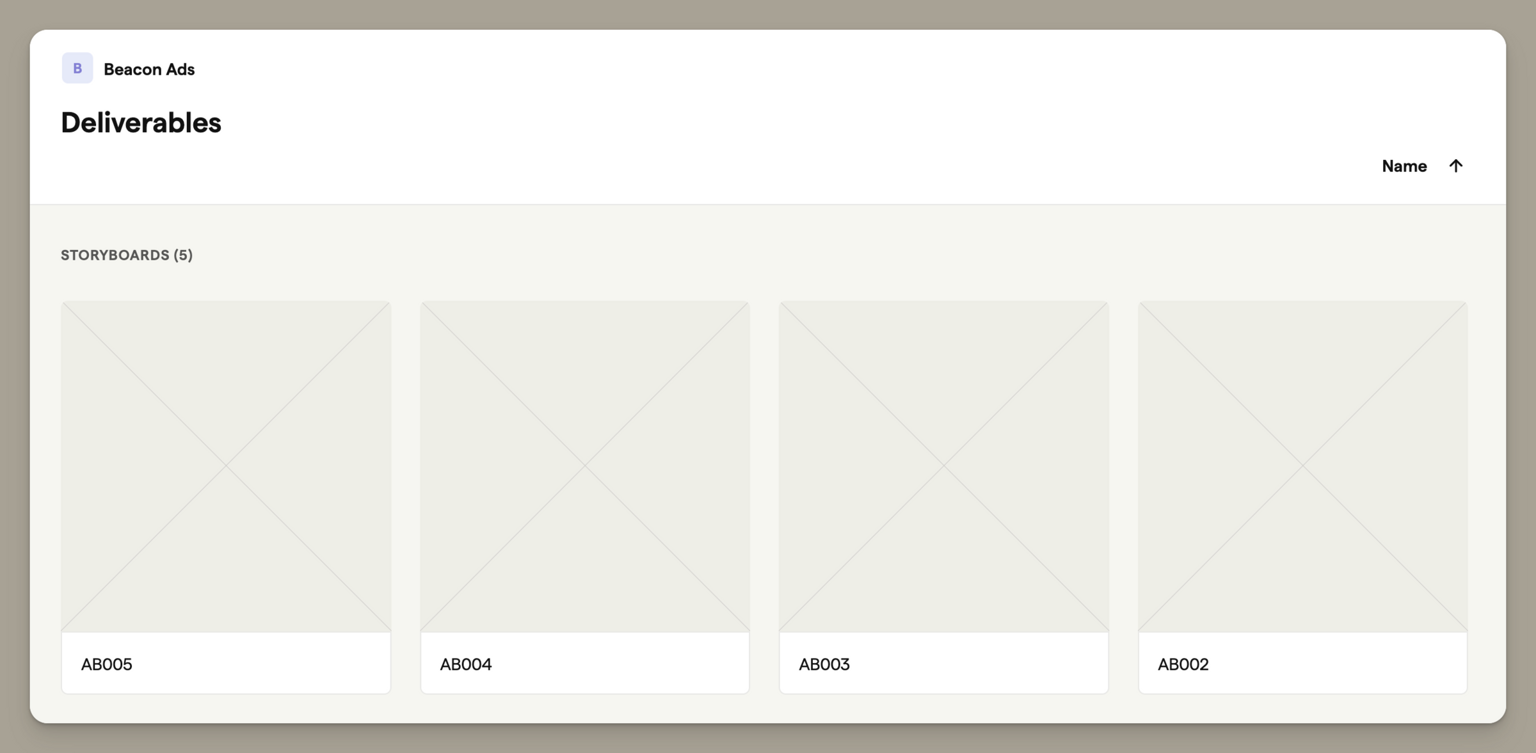
Toggle Enable public link to generate a shareable URL. Anyone with this link can view the project and its storyboards without needing a Boords account.
Link settings
Once sharing is enabled, you can customise what viewers see:
- Include project description — Show the project description on the shared page
- Include sub-projects — Allow viewers to navigate into sub-projects
- Add password protection — Require a password to access the shared project (available on Pro plans and above)
If password protection is enabled, a randomly generated password is created automatically. Share both the link and the password with your recipients.
Moving projects and storyboards
You can reorganise your workspace by moving items to different locations using either the menu or drag and drop.
Moving via the menu
- Click the three-dot menu on the project or storyboard
- Select Move to
- Choose the new location from the project tree
- Click Move
Drag and drop
Drag and drop provides a quick way to reorganise your workspace:
From the main content area:
- Drag any storyboard card onto a project in the sidebar to move it into that project
- Drag any sub-project card onto a project in the sidebar to nest it inside that project
Within the sidebar:
- Drag projects up and down to reorder them
- Drop a project onto another project to make it a sub-project
- Drop a project at the root level (the Projects header) to move it out of its current parent
When you drag an item, valid drop targets highlight to show where you can release it. The drop is prevented if it would create an invalid structure (such as moving a project into itself or one of its own sub-projects).
Bulk moving
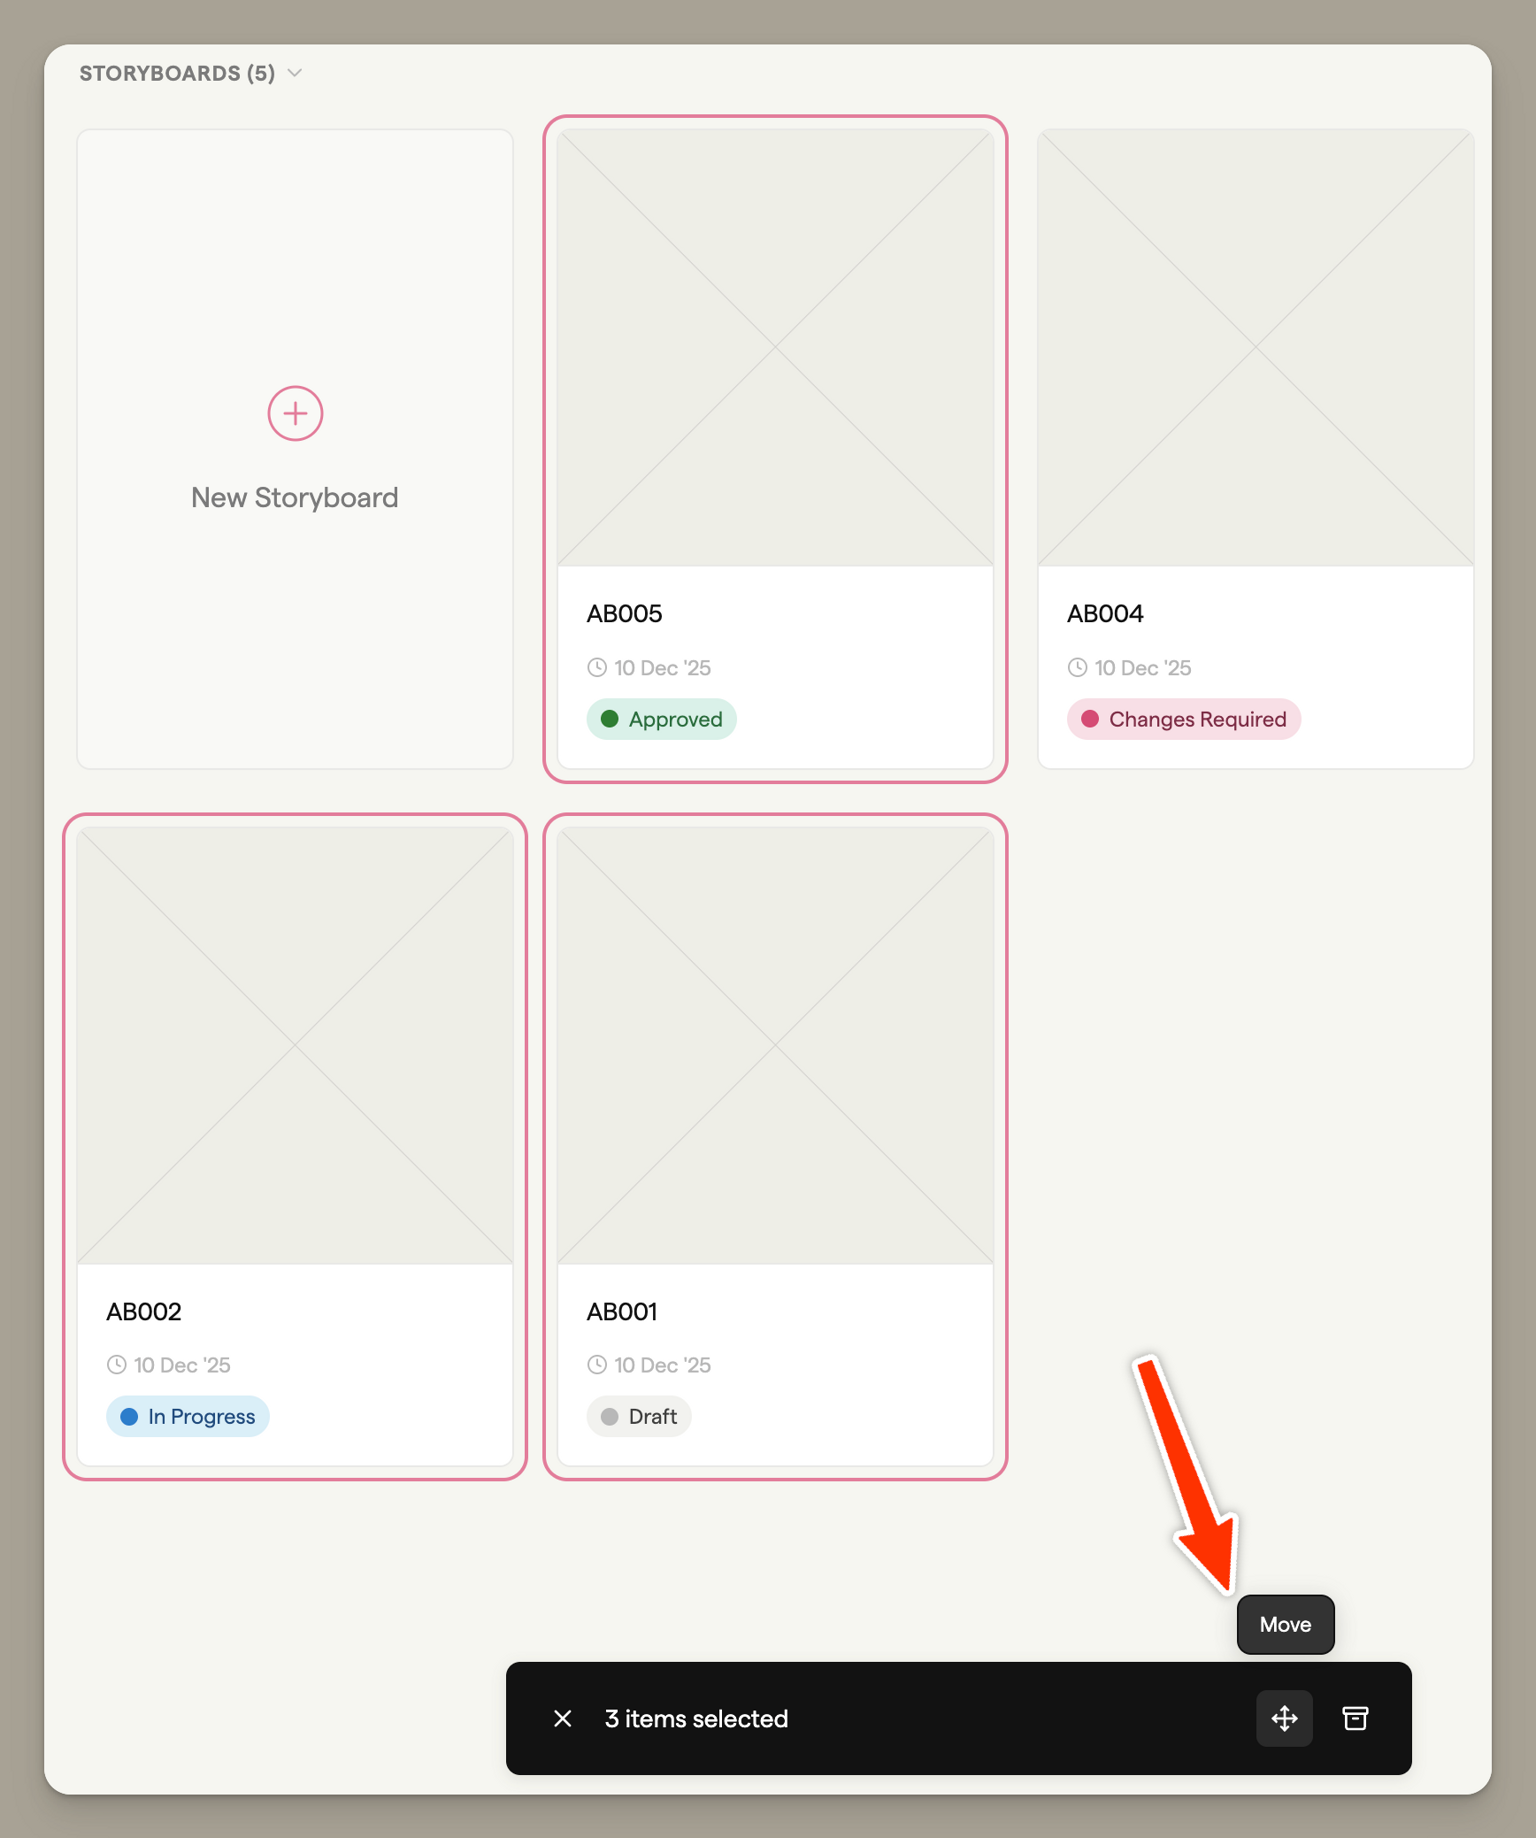
Select multiple items by clicking their cards, then use the toolbar that appears at the bottom to move them all at once.
Archiving
To remove a project, storyboard, or script without permanently deleting it, use the Archive option from the three-dot menu. Archived items are moved to the Archive where they can be restored later.
Archiving a project also archives all storyboards and scripts inside it. Restoring the project brings them back. Archiving a script archives its whole version history and frees one of your active script slots.
Storyboard actions
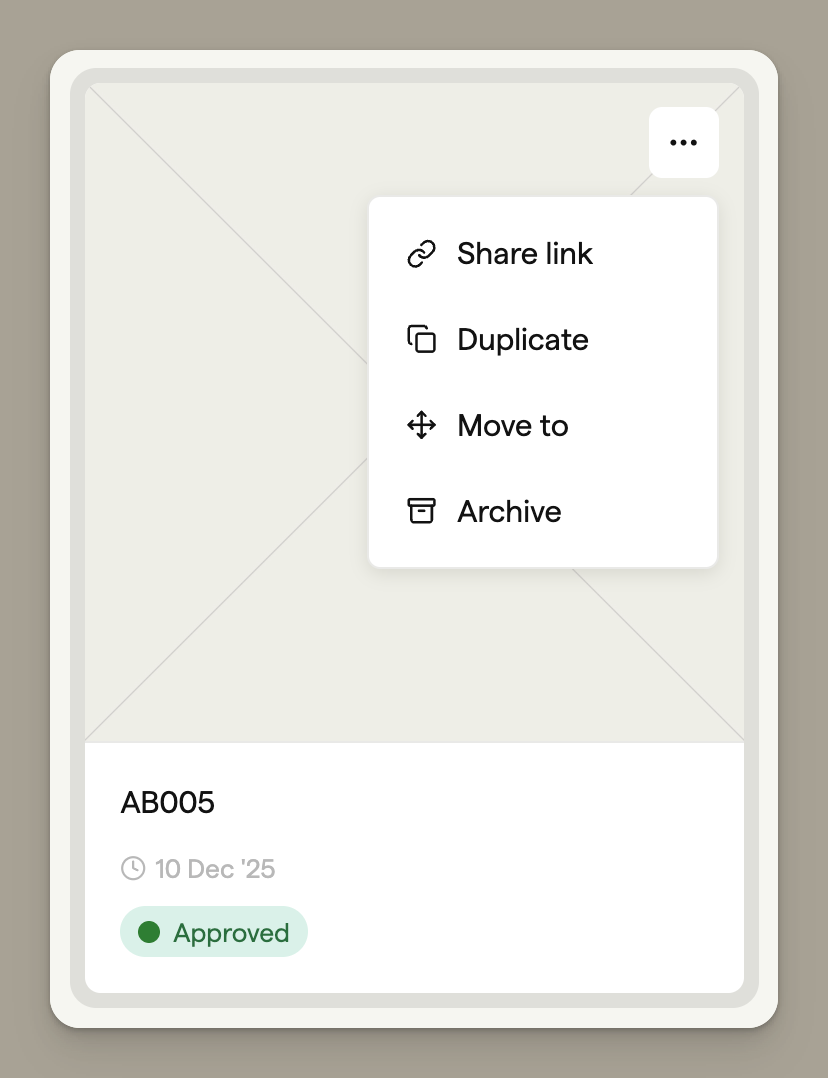
Hover over any storyboard card to reveal the actions menu (three dots). From here you can:
- Share link — Get a shareable link to the storyboard
- Duplicate — Create a copy of the storyboard in the same project
- Move to — Move the storyboard to a different project
- Archive — Send the storyboard to the archive
Script actions
Script cards have the same actions menu: Share (the review link), Duplicate (a new, independent copy of the current version), Move to, and Archive. See Versions and exports for the difference between duplicating a script and creating a new version.